
 fyndup

Quick, Clean, and Permanent: Install Your Built-In Dishwasher
Learn a straightforward six-step method to replace or install a built-in dishwasher safely and neatly, integrating it with modular kitchen storage, induction cooktops, premium cookware, and other appliances like mixer grinders and air fryers for a seamless, organized kitchen today.
What You’ll Need (and What to Clear First)
Install a Dishwasher Fast: Easy Step-by-Step Guide
Step 1 — Measure, Plan, and Power Off
Want a perfect fit? A sloppy measurement means a wobbly dishwasher — measurements matter more than you think.Measure the cabinet opening height, width, and depth. Compare those numbers to the dishwasher’s specs. Check countertop overhang and adjacent items—like an induction cooktop, modular kitchen storage, or a stack of premium cookware—that may affect fit or door swing.
Locate the water shutoff and the dishwasher circuit breaker. Turn off the water and switch off power before touching anything. Sketch a simple plan showing where the water supply, drain, and electrical connection will run.
Make a quick inventory if removing an old unit: note any trim, screws, or brackets to reuse. For example, if a mixer grinder or tall water bottle sits beside the cabinet, move it to test clearance and access. Proper planning protects countertops, home decor items, and appliances like vacuum cleaners and air fryers.

Step 2 — Remove the Old Cabinet or Appliance
Out with the old — careful removal beats frantic repairs later. Don’t be tempted to force anything out.Disconnect the water supply and drain hose first. Then confirm the circuit breaker is OFF and disconnect the electrical connection—never touch wiring until power is confirmed off.
Remove mounting screws, toe-kick, and facing panels carefully; store all hardware in a labeled bag. Slide the old dishwasher out on its rails or lift it out with a helper; place a towel or plastic floor protector under the appliance to avoid scratches.
Detach a full cabinet from adjacent units if needed and cap or patch exposed wiring/plumbing. Follow local rules to dispose of or store the old appliance safely.
Step 3 — Position the Dishwasher and Hook Up Water/Drain
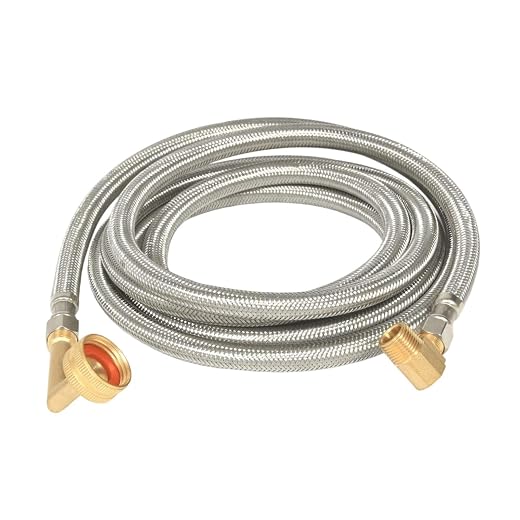
Plumbing done right = years of dry floors. Small leaks hide in corners — seal them now.Slide the dishwasher partially into the cavity so the inlet and drain are reachable. Attach a braided stainless water line to the dishwasher inlet, wrapping threads with plumber’s tape and tightening securely with a wrench. Connect the drain hose to the sink tailpiece or garbage disposal—use the disposal’s inlet or the tailpiece knockout.
Turn the water valve on briefly and inspect all connections for drips before sliding the dishwasher fully into place; stop and tighten any leaking joint immediately.

Step 4 — Make the Electrical Connection Safely
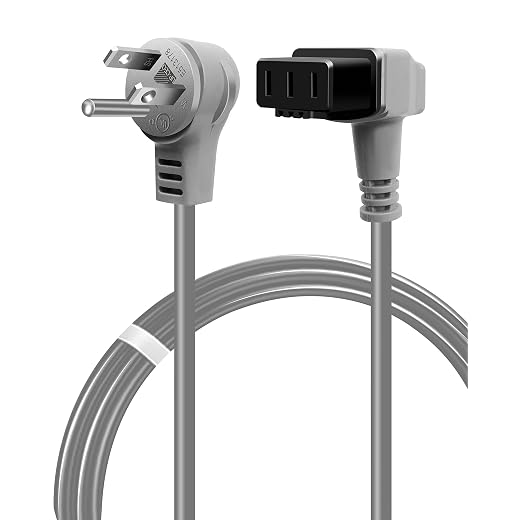
Hardwire or plug? A dedicated circuit is a must — don’t gamble with shared lines.Confirm the dishwasher’s electrical requirements (a dedicated 120V circuit is common) and decide whether the unit will plug in or be hardwired. If it plugs in, ensure the outlet is grounded and accessible (for example, an outlet inside the sink cabinet).
If hardwiring, run the supply cable into the dishwasher’s junction box per local code and connect wires: black to hot, white to neutral, and green/bare to ground. Secure a strain relief and tuck wires so the door closes flush.
Before restoring power, double-check all connections and confirm the circuit won’t be overloaded.
Step 5 — Level, Secure, and Fit the Trim
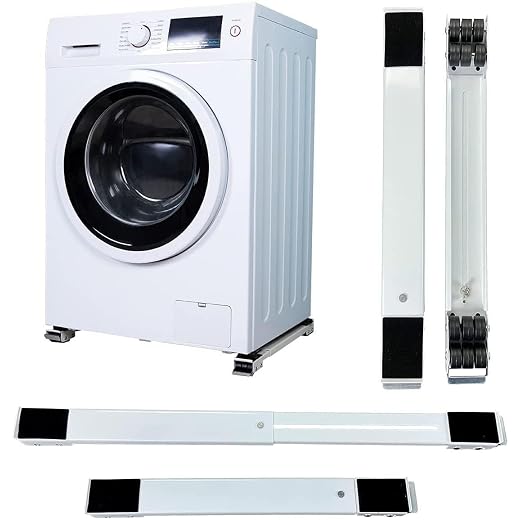
A level dishwasher isn’t just neat — it protects seals and reduces noise. Tiny tweaks go a long way.Push the dishwasher fully into the cavity and use a spirit level to check left-to-right and front-to-back. Adjust the leveling feet until the unit is perfectly plumb; if it tilts forward, raise the front feet a few turns. Tighten the lock nuts to hold the height.
Attach the manufacturer’s mounting brackets to the cabinet or countertop to prevent tipping. Reattach or install the toe-kick and any decorative panels so they align with surrounding modular kitchen storage; shim panels if needed.
Important checks:
Secure trim screws and clean the area of dust and packaging.

Step 6 — Run Tests, Troubleshoot, and Finalize
First cycle is your victory lap — watch for leaks, odd sounds, or error codes. Rapid troubleshooting saves service calls.Restore water and power, then run a short empty wash cycle. Listen for unusual noises and inspect the water inlet, drain hose, and door gasket for drips. If you see leaks, tighten hose nuts or replace clamps; if it won’t start, recheck wiring connections and the breaker.
Confirm racks glide smoothly and the door latch engages; ensure the door clears induction cooktop edges.
Quick checklist:
You’re Done — Enjoy Cleaner, Easier Dishwashing
With correct measurements, safe plumbing and electrical connections, and careful leveling, your built-in dishwasher will blend with your modular kitchen and serve reliably; try the installation yourself, keep maintenance simple, and share your results to inspire others—start today right now!


Nice guide — concise and no-nonsense. I removed an old cabinet (Step 2) and the demo was cleaner than I expected.
One snag: the drain hose in my rental had rusted clamp fittings. Swapped them for stainless clamps and good to go.
Good tip, Oliver — stainless clamps are inexpensive and last way longer. Thanks for the practical note!
Totally. I also used a short piece of flexible hose to bridge an awkward fit. Saved me from cutting into the cabinet.
Nice, Nora — the flexible hose trick is solid. Also pro tip: smear a little plumber’s grease on O-rings when connecting.
Helpful guide overall, but a section on water shut-off valves would be great.
I couldn’t find the valve under my sink (turned out be behind the dishwasher in a tight space).
Also, FYI: bring a bucket and towel for any dripping, and bring a 3/8″ compression fitting adapter if you have older lines.
Would recommend adding a short list of must-have parts: stainless clamps, 3/8″ adapter, quick-connect fittings, and Teflon tape.
Otherwise, this made the install much less scary — thanks!
Adding these practical tips to the checklist now — thanks everyone for the contributions!
Agree on the bucket/towel. I forgot and ended up mopping for 20 minutes. Also keep a pair of channel-lock pliers handy.
Excellent suggestion, Priya — we’ll add a short parts checklist and a note on typical valve locations. Those adapters save lots of headaches.
If your valve is behind the dishwasher, pull the unit out a few inches first before turning it off — some valves get stuck if you force them.
Thanks Mark & Helena — good call on channel-locks. And yes, pulling the unit out first is a lifesaver.
Finished Step 6 yesterday — ran two cycles and checked for leaks.
Leveling made a massive difference; the door opens smoothly now.
Short and sweet: bring a small level and use the adjustable feet.
Also check the spray arm spins freely after the first run — sometimes shipping brackets block it and you don’t notice until mid-cycle.
Nice work, Noah — testing is the best final step. Glad the level helped!
Ha — my husband called it ‘6 easy steps’ and then we spent a Sunday afternoon installing it 😂
Step 3 (water/drain) was more of a puzzle than ‘easy’ for us.
We had a slow drip from the hose connection that took 3 tries to fix — turned out the O-ring was misplaced.
Also, if you have an anti-flood device, make sure the float sensor is accessible; ours got jammed behind insulation and tripped once.
PS: bring snacks. Installing appliances is always hunger-inducing 😋
Snack tip is top-tier advice. 😂 Also, if the float trips, check for packaging debris — sometimes foam pieces hide in the drain area.
Loved this — installing together is a weekend event for many! Good reminder to inspect O-rings and check anti-flood sensors for accessibility.
Rafael so true — we found a tiny plastic tab from the packaging that was causing havoc. Ugh.
Guide was helpful but reality: it took me a whole Saturday and a little cursing. Not “6 easy steps” for someone who hasn’t done it before 😅
Cabinet removal was the longest part — old glue and hidden screws everywhere. Tip: keep a heat gun for sticky trim and a multi-bit driver for odd screws.
Also, make sure the dishwasher’s height range matches your cabinet opening — some models need extra adjustments.
If you’re feeling stuck, pull some measurements and post pics — this community can usually spot issues quickly.
Thanks for the honesty, Marcus — good reminder that time varies by home. Heat guns are a pro tip for glued trim, and the height check is crucial.
Will do, Connor — might post pics if I attempt a panel replacement next. Thanks for the support!
Totally. Old cabinets are the wildcard. If glue’s bad, a thin pry bar and patience win the day. Wear gloves — splinters are the worst.
Great step-by-step — I actually followed Steps 1–4 last weekend.
Couple things I learned the hard way:
1) Turn the breaker off, then test the circuit with a non-contact tester (saved me from a nasty surprise).
2) Measure twice — the dishwasher looked like it would fit until the countertop overhang hit the door.
Quick question: do I need a dedicated circuit for a standard dishwasher or is sharing OK? 🤔
I live in a place where they allowed it on a garbage disposal circuit, but electrician told me dedicated is best. Less tripping and easier troubleshooting.
Thanks for sharing, Maya — glad the guide helped! Most codes require a dedicated circuit for dishwashers, but local rules vary. If you’re unsure, call a licensed electrician or check your local code. A dedicated 15–20A circuit is common.
Okay, real talk — Step 5 (level and fit the trim) took me forever.
My floor is slightly off and the dishwasher kept rocking forward when I opened the door.
I tried shims under the feet but still had to sand the front plinth a bit to get the trim flush.
Also the trim screws on mine were tiny and stripped easy — bring an extra set of screws and a magnetic driver.
Would LOVE a photo guide for tricky trim situations — some of these doors are dramatic lol.
I had the same issue — I used heavy-duty zip ties temporarily to pull the trim snug while I tightened the screws. Ugly but worked until I got new screws 😅
Thanks Derek & Priya — metal shims sound way better. Zip-tie hack is hilarious but effective, lol.
If the floor is uneven, try leveling with thin metal shims under the dishwasher feet (not wood). They compress less. Also double-check the anti-tip bracket placement.
Thanks for the detailed feedback, Sofia — great practical tips. We’ll look into adding a photo walkthrough for trim/door alignment in a future revision. For stripped screws, a small screw extractor set helps too.
I like that Step 4 stresses safety for the electrical connection.
But I’m confused: the manual for my dishwasher shows both a power cord option and hardwired wiring. Any rule of thumb which is better for long-term?
I went hardwired for appearance. If you rent or plan to move appliances around, a corded setup is more flexible.
Good question. Hardwiring gives a cleaner look and avoids exposed cords, but using a plug-on cord on a nearby outlet makes future replacement easier. Check local code — some areas require hardwiring. If in doubt, have an electrician advise.